
2
Attach
Attach the template and any documents or exports containing the required data.
Configure with AI
Use your AI assistant to turn existing documents, exports and data into the configuration files required by Tax Automation Lab tools.
Every firm organises data and documents differently. The aim is not to impose a new format, but to use your AI as a translation layer between what you already have and the files required by the tools.
Download the tool template directly from this page.
Attach the template and any documents or exports containing the required data.
Copy the prepared prompt and let the AI complete the file without changing its structure.
Review mappings, assumptions and missing data, then import the file into the tool.
You may use any equivalent document, report or export. What matters is that the AI can identify the required information and connect it to a verifiable source. If information cannot be supported, the prompt requires the AI to leave it blank and flag it.
Complete master data, accounts, current and prior balances, and mapping to Italian statutory framework items. The file includes a separate sheet for uncertainties, sources and review points.
Act as an accounting data-preparation assistant for Tax Automation Lab.

COMMON RULES FOR ALL TAX AUTOMATION LAB TEMPLATES
They come before and above the specific instructions that follow.
1.  Read the template’s ISTRUZIONI sheet first: it holds the rules for this
    file, and they override any habit of yours.
2.  Use only the evidence contained in the attached documents. If a figure is
    not there, it is not there: do not reconstruct it, do not estimate it, do
    not fill it in by analogy.
3.  Do not correct and do not complete identifiers: tax codes, VAT numbers,
    tribute codes, VAT codes, account codes. Report them as they are and flag
    them. The formal check is the tool’s job, and that is how it should be.
4.  Delete or ignore every example row. If the template has an examples sheet,
    do not copy its content into the working sheets.
5.  Do not leave default values the document does not support. If a field
    allows a choice — statement layout, filing frequency, section — and the
    source does not state it, leave it empty: do not choose for the reader.
6.  If a figure is ambiguous, leave the cell empty and open a blocking finding
    in the “Esiti AI” sheet. An empty cell is visible; a confidently invented
    figure is not, and it travels all the way to the tax return.
7.  Cite the source of every non-obvious figure: document, sheet, row or page.
8.  Reconcile the counts: how many rows you read, how many you wrote, how many
    you aggregated, how many you excluded and why. The totals must add up.
9.  Do not rename sheets, columns or headers, do not add any and do not reorder
    them: the tool recognises them by name.
10. Do not declare a job complete while blocking findings are still open.

OBJECTIVE
Complete “Template_TaxTool_FS_AI.xlsx” so that it can be imported into the Italian statutory statements · ITA GAAP tool without changing the required structure.

ATTACHED MATERIALS
I am attaching the template and one or more documents or exports containing the available company data. They may include, for example, a trial balance, chart of accounts, general-ledger extracts, management reporting, approved financial statements, a company-register extract or master-data sheets. This list is illustrative only: use any equivalent document that allows you to retrieve the required information.

PROCEDURE
1. Read the “Istruzioni” and “Voci IV Direttiva” sheets first.
2. Identify the company information and complete “Anagrafica”.
3. Enter one row for each balance-sheet account in “Stato Patrimoniale” and one row for each income or expense account in “Conto Economico”.
4. Report account code, description, current-year amount and, where available, prior-year amount.
5. Map each account only to a code listed in “Voci IV Direttiva”.
6. Record missing data, assumptions, sources and matters requiring professional review in “Esiti AI”.

MANDATORY RULES
- Do not rename or delete sheets, and do not add columns to the sheets imported by the tool.
- Do not invent data or classifications.
- Where a mapping is not sufficiently supported, leave “Voce IV Direttiva” blank and report the issue in “Esiti AI”.
- Preserve the source-file sign convention. Unless evidence indicates otherwise: assets and expenses positive; liabilities, equity and revenue negative; contra-asset provisions negative.
- Do not offset separate accounts or aggregate rows unless the source itself is already aggregated.
- Enter values only, with no formulas or external links.

EXPECTED RESULT
Return the completed XLSX file with the exact sheet names and headers, together with a very brief summary of completed data and outstanding reviews. A professional will review the file before import.

MANDATORY RULE — ACCOUNTS, SUBACCOUNTS AND GRANULARITY
- Never merge a subaccount into its parent account. Preserve every source accounting row independently.
- Keep the complete ERP account code unchanged; do not invent suffixes or renumber accounts.
- Preserve repeated account codes with different descriptions as separate rows.
- Every original accounting row must be preserved 1:1, excluding only blank and clearly identified total rows. TAL_AIX is the only additional technical row permitted by this rule.
- Reconcile original rows separately before returning the file: source original rows considered = original rows preserved in the output. Disclose every exclusion and report TAL_AIX separately.

YEAR-END RESULT AND DIFFERENT TRIAL-BALANCE FORMS
The source may be a pre-closing trial balance, a post-closing trial balance or an already reclassified statement. For each year:
1. calculate the net Balance Sheet balance separately;
2. calculate the Income Statement result separately;
3. verify whether the Balance Sheet difference equals the Income Statement result with the opposite sign;
4. verify whether equity already includes a current-year profit/loss line mapped to A.IX.

If the result is already included in the Balance Sheet, do not add or duplicate any row.

If it is absent and the Balance Sheet difference exactly reconciles to the Income Statement result, treat the file as pre-closing. Preserve all source rows and add one additional technical row only:
- Account code: TAL_AIX;
- Description: Current-year profit — derived technical row, or Current-year loss — derived technical row;
- Italian statutory line: AIX;
- Amount: the amount required to complete the reconciliation under the template sign convention.

TAL_AIX is not an ERP code and does not alter the source-row count. Record it separately in “Esiti AI” as a derived technical row, showing the Balance Sheet difference, Income Statement result, reconstructed amount and required professional review.

If the Balance Sheet difference does not reconcile to the Income Statement result, do not create balancing entries, fictitious accounts or compensating values. Preserve the available data and report the anomaly in “Esiti AI”. Never create TAL_AIX merely to force an unsupported balance.

CLOSING CONTROL TO REPORT IN “ESITI AI”
- detected form: pre-closing, post-closing or undetermined;
- detected sign convention;
- Balance Sheet balance;
- Income Statement result;
- presence or absence of A.IX;
- any TAL_AIX row added;
- final reconciliation;
- unresolved anomalies.
The prompt tells the AI not to invent information, not to change the template structure and to separate all review points clearly.
Prepare classified financial-statement data for management reclassifications, KPIs, dashboard, cash-flow analysis, budget, forecast and cost centres while preserving every account and subaccount.
Act as an accounting data-preparation assistant for Tax Automation Lab.

COMMON RULES FOR ALL TAX AUTOMATION LAB TEMPLATES
They come before and above the specific instructions that follow.
1.  Read the template’s ISTRUZIONI sheet first: it holds the rules for this
    file, and they override any habit of yours.
2.  Use only the evidence contained in the attached documents. If a figure is
    not there, it is not there: do not reconstruct it, do not estimate it, do
    not fill it in by analogy.
3.  Do not correct and do not complete identifiers: tax codes, VAT numbers,
    tribute codes, VAT codes, account codes. Report them as they are and flag
    them. The formal check is the tool’s job, and that is how it should be.
4.  Delete or ignore every example row. If the template has an examples sheet,
    do not copy its content into the working sheets.
5.  Do not leave default values the document does not support. If a field
    allows a choice — statement layout, filing frequency, section — and the
    source does not state it, leave it empty: do not choose for the reader.
6.  If a figure is ambiguous, leave the cell empty and open a blocking finding
    in the “Esiti AI” sheet. An empty cell is visible; a confidently invented
    figure is not, and it travels all the way to the tax return.
7.  Cite the source of every non-obvious figure: document, sheet, row or page.
8.  Reconcile the counts: how many rows you read, how many you wrote, how many
    you aggregated, how many you excluded and why. The totals must add up.
9.  Do not rename sheets, columns or headers, do not add any and do not reorder
    them: the tool recognises them by name.
10. Do not declare a job complete while blocking findings are still open.

OBJECTIVE
Complete “Template_Analisi_di_Bilancio_AI.xlsx” so that it can be imported into the Financial Analysis tool without changing the required structure.

SOURCE MATERIALS
Use the attached trial balance, chart of accounts, statutory financial statements, management reporting and any equivalent documents that support the requested information.

PROCEDURE
1. Read the “Istruzioni” and “Voci IV Direttiva” sheets first.
2. Complete the company information using supported data only.
3. Preserve one independent row for every account, subaccount and lower-level account.
4. Enter current-year and prior-year balances where available.
5. Map each row to the relevant Italian statutory line item.
6. Complete optional Budget, Forecast and Cost Centre sheets only when supported.
7. Record missing data, assumptions, sources and review points in “Esiti AI”.

MANDATORY GRANULARITY RULES
- Never merge a subaccount into its parent account.
- Keep the complete original ERP account code unchanged. Do not invent suffixes or renumber accounts.
- Rows with the same code but different descriptions must remain separate.
- Do not change the source chart-of-accounts granularity.
- Every original accounting row must be preserved 1:1, excluding only blank rows and clearly identified totals. TAL_AIX is the only additional technical row permitted by this rule.
- Before returning the workbook, reconcile original rows separately: source original rows considered = original rows preserved in the output. Explain every exclusion and report TAL_AIX separately.

OTHER MANDATORY RULES
- Do not rename sheets, headers or required columns.
- Do not invent data or classifications.
- Do not insert formulas or external links.
- Preserve the sign convention of the source file.
- When a classification is not sufficiently supported, leave it blank and record the issue in “Esiti AI”.

EXPECTED OUTPUT
Return the completed XLSX file with the original sheet names and headers, plus a brief summary of completed data and remaining professional-review points.

YEAR-END RESULT AND DIFFERENT TRIAL-BALANCE FORMS
The source may be a pre-closing trial balance, a post-closing trial balance or an already reclassified statement. For each year:
1. calculate the net Balance Sheet balance separately;
2. calculate the Income Statement result separately;
3. verify whether the Balance Sheet difference equals the Income Statement result with the opposite sign;
4. verify whether equity already includes a current-year profit/loss line mapped to A.IX.

If the result is already included in the Balance Sheet, do not add or duplicate any row.

If it is absent and the Balance Sheet difference exactly reconciles to the Income Statement result, treat the file as pre-closing. Preserve all source rows and add one additional technical row only:
- Account code: TAL_AIX;
- Description: Current-year profit — derived technical row, or Current-year loss — derived technical row;
- Italian statutory line: AIX;
- Amount: the amount required to complete the reconciliation under the template sign convention.

TAL_AIX is not an ERP code and does not alter the source-row count. Record it separately in “Esiti AI” as a derived technical row, showing the Balance Sheet difference, Income Statement result, reconstructed amount and required professional review.

If the Balance Sheet difference does not reconcile to the Income Statement result, do not create balancing entries, fictitious accounts or compensating values. Preserve the available data and report the anomaly in “Esiti AI”. Never create TAL_AIX merely to force an unsupported balance.

CLOSING CONTROL TO REPORT IN “ESITI AI”
- detected form: pre-closing, post-closing or undetermined;
- detected sign convention;
- Balance Sheet balance;
- Income Statement result;
- presence or absence of A.IX;
- any TAL_AIX row added;
- final reconciliation;
- unresolved anomalies.
The prompt preserves chart-of-accounts granularity, prohibits aggregation and requires source-to-output row reconciliation.
Configure master data and the permanent meaning of VAT codes. This stage does not include monthly or quarterly amounts, which are uploaded later in the tool.
Act as a VAT data-preparation assistant for Tax Automation Lab.

COMMON RULES FOR ALL TAX AUTOMATION LAB TEMPLATES
They come before and above the specific instructions that follow.
1.  Read the template’s ISTRUZIONI sheet first: it holds the rules for this
    file, and they override any habit of yours.
2.  Use only the evidence contained in the attached documents. If a figure is
    not there, it is not there: do not reconstruct it, do not estimate it, do
    not fill it in by analogy.
3.  Do not correct and do not complete identifiers: tax codes, VAT numbers,
    tribute codes, VAT codes, account codes. Report them as they are and flag
    them. The formal check is the tool’s job, and that is how it should be.
4.  Delete or ignore every example row. If the template has an examples sheet,
    do not copy its content into the working sheets.
5.  Do not leave default values the document does not support. If a field
    allows a choice — statement layout, filing frequency, section — and the
    source does not state it, leave it empty: do not choose for the reader.
6.  If a figure is ambiguous, leave the cell empty and open a blocking finding
    in the “Esiti AI” sheet. An empty cell is visible; a confidently invented
    figure is not, and it travels all the way to the tax return.
7.  Cite the source of every non-obvious figure: document, sheet, row or page.
8.  Reconcile the counts: how many rows you read, how many you wrote, how many
    you aggregated, how many you excluded and why. The totals must add up.
9.  Do not rename sheets, columns or headers, do not add any and do not reorder
    them: the tool recognises them by name.
10. Do not declare a job complete while blocking findings are still open.

OBJECTIVE
Complete “LIPE_Codiciario_AI.xlsx” to configure the client’s master data and permanent VAT-code mapping once in the LIPE Generator.

IMPORTANT
This file is only for client setup. Do not enter monthly or quarterly amounts. Period amounts will be uploaded later directly in the tool.

ATTACHED MATERIALS
I am attaching the template and one or more documents or exports that explain the VAT codes. They may include, for example, an ERP VAT-code list, VAT ledgers, periodic VAT calculations, accounting reports, posting examples, previous LIPE filings or XML files, or internal instructions. This list is illustrative only: use any equivalent document that reliably explains the codes and master data.

PROCEDURE
1. Read “Istruzioni”, “Anagrafica” and “Codiciario” first.
2. Complete master data using only information supported by the documents.
3. Enter every permanent VAT code in “Codiciario”, with a clear description.
4. Set VP destinations only where supported:
   - “Imponibile →” = VP2 for output transactions or VP3 for input transactions;
   - “IVA esigibile →” = VP4;
   - “IVA detraibile →” = VP5;
   - a reverse-charge code may flow to VP3, VP4 and VP5 at the same time where the documents support this;
   - an excluded code must have all destinations blank, with the reason stated in Notes.
5. Use percentages only for partial allocation; otherwise leave them blank so that the tool applies 100%.
6. Record ambiguous codes, missing data, assumptions and sources in “Esiti AI”.

MANDATORY RULES
- Do not rename sheets or headers and do not add columns to “Codiciario”.
- Do not invent VAT treatments.
- If a destination is not sufficiently supported, leave it blank and report the issue in “Esiti AI”.
- Do not infer the VAT treatment from the code number or abbreviation alone.
- Do not enter period taxable amounts or VAT amounts in this file.
- Enter values only, with no formulas or external links.

EXPECTED RESULT
Return the completed XLSX file and a very brief summary of configured codes, excluded codes and matters requiring professional review. A professional will review the file before import.
The prompt tells the AI not to invent information, not to change the template structure and to separate all review points clearly.
The template collects the payments row by row: taxpayer, payment flow, date, section, tribute code, period, year and amount. Every combination of taxpayer, date and flow becomes a separate F24, so the way the AI assigns the flows decides how many forms you will get.
Act as a tax data-preparation assistant for Tax Automation Lab.

COMMON RULES FOR ALL TAX AUTOMATION LAB TEMPLATES
They come before and above the specific instructions that follow.
1.  Read the template’s ISTRUZIONI sheet first: it holds the rules for this
    file, and they override any habit of yours.
2.  Use only the evidence contained in the attached documents. If a figure is
    not there, it is not there: do not reconstruct it, do not estimate it, do
    not fill it in by analogy.
3.  Do not correct and do not complete identifiers: tax codes, VAT numbers,
    tribute codes, VAT codes, account codes. Report them as they are and flag
    them. The formal check is the tool’s job, and that is how it should be.
4.  Delete or ignore every example row. If the template has an examples sheet,
    do not copy its content into the working sheets.
5.  Do not leave default values the document does not support. If a field
    allows a choice — statement layout, filing frequency, section — and the
    source does not state it, leave it empty: do not choose for the reader.
6.  If a figure is ambiguous, leave the cell empty and open a blocking finding
    in the “Esiti AI” sheet. An empty cell is visible; a confidently invented
    figure is not, and it travels all the way to the tax return.
7.  Cite the source of every non-obvious figure: document, sheet, row or page.
8.  Reconcile the counts: how many rows you read, how many you wrote, how many
    you aggregated, how many you excluded and why. The totals must add up.
9.  Do not rename sheets, columns or headers, do not add any and do not reorder
    them: the tool recognises them by name.
10. Do not declare a job complete while blocking findings are still open.

OBJECTIVE
Complete the PAGAMENTI sheet of “Template_F24_Configura_AI_v1.0.xlsx” to prepare
one or more F24 payment forms, for one or more taxpayers. The file must not
contain any identifier internal to the tool: only data found in the attached
documents.

BEFORE YOU START
1. Read the ISTRUZIONI sheet of the template: it holds the filling rules that
   apply to this file, and they override any habit of yours.
2. The PAGAMENTI sheet arrives empty, with headers only. That is correct: it is
   the sheet you have to fill in.
3. The ESEMPI_NON_IMPORTARE sheet holds example rows about invented companies
   (ALFA S.R.L., BETA S.P.A.). They are only there to show you the shape of a
   correct row. Do not copy them into PAGAMENTI, do not modify them, do not
   delete them: the tool does not read that sheet, and it recognises and
   discards those rows even if they end up elsewhere.
4. Do not leave in PAGAMENTI any row that does not come from the attached
   documents.

AVAILABLE MATERIALS
I am attaching the template and one or more documents: they may be withholding
calculation schedules, payroll summaries, DM10 forms or UniEmens extracts, VAT
settlements, IMU calculations, local authority notices, INAIL self-assessments,
voluntary-correction schedules, or exports from an accounting system or ERP. Use
what is there. If a document is illegible or ambiguous, do not try to guess its
content.

ABSOLUTE RULES
1. Do not invent. Fill in only what is supported by an attached document.
2. Do not correct and do not “tidy up” tax codes, VAT numbers, tribute codes or
   contribution reasons. If an identifier has an unusual length, report it as it
   is and flag it in the final summary: the tool will reject it, and that is how
   it should be.
3. Do not fill in Importo debito and Importo credito on the same row. If a
   document shows a net balance and does not separate the debit leg from the
   credit leg, leave both columns empty, fill in the rest of the row and write
   the case in the summary as a blocking point. Do not infer the sign from a
   balance: getting it wrong produces a wrong payment, and that is exactly what
   happens if you pick one of the two columns yourself.
4. Do not change the sheet header, do not add columns, do not reorder them and
   do not rename them: the tool recognises them by name.
5. Do not round. Report amounts with the cents exactly as they appear in the
   source document.

SHEET NAMES, COLUMN NAMES AND LIST VALUES STAY IN ITALIAN
The tool recognises the sheet, the headers and the values of choice fields by
their Italian name. Write your notes in the language you prefer, but leave
“PAGAMENTI”, “Importo debito”, “Erario”, “Dipendenti” and every other name and
list value below exactly as they are.

HOW TO FILL IN THE COLUMNS
- Denominazione, Codice fiscale, Partita IVA: needed when the file holds more
  than one company. If you are working on a single company already selected in
  the tool, leave them empty: the rows will be assigned to that company.
- Flusso and Descrizione flusso: the type of payment (Dipendenti, Autonomi, IVA,
  Imposte, IMU, Ravvedimenti). Rows with the same taxpayer, the same Data
  pagamento and the same Flusso end up in the same F24. Use different flows to
  separate payments that must stay on distinct forms.
- Data pagamento: the payment due date, in DD/MM/YYYY format.
- Sezione: one of Erario, INPS, Regioni, IMU e altri tributi locali, INAIL,
  Altri enti previdenziali e assicurativi. Write it out in full.
- Codice tributo / causale: the code exactly as it appears in the instructions
  for that tribute or in the source document.
- Periodo / rateazione: four digits. 0008 for the month of August; 0101 when the
  instructions for that tribute provide for a single payment. For tributes that
  do not require it, leave it empty.
- Anno: the year the tribute refers to, not the year of payment.
- Importo debito / Importo credito: positive values, in one of the two columns
  only.
- Codice ente / sede / regione / comune: INPS office code, region code, the
  municipality land-registry code for IMU, INAIL office code, depending on the
  section.
- Matricola / posizione / riferimento: INPS registration number, position code,
  INAIL reference number.
- Periodo da / Periodo a: only for the sections that provide for them (typically
  INPS and Altri enti), in MM/YYYY format.
- The remaining columns (office code, assessment code, IMU flags, number of
  properties, deduction, INAIL data, jointly liable party, notes) are to be
  filled in only where the document supports them. Empty is an acceptable
  outcome.

CAPACITY OF THE FORM
A single F24 has a fixed number of rows per section: Erario 6, INPS 4, Regioni 4,
IMU and local tributes 4, INAIL 3, Altri enti 2. If for one taxpayer and one date
you exceed the limit of a section, spread the rows across several flows: each
flow becomes a distinct F24. Say in the summary when you have done this.

OFFSETTING
If a document shows a credit to be used for offsetting, report it in the Importo
credito column with its tribute code and its year. Do not assess entitlement,
remaining availability, the compliance certificate or the annual limits: that is
not a judgement you can make from the attached documents. List them in the
summary as points to verify instead.

FINAL SUMMARY
After the file, produce a bulleted list with:
- the taxpayers and the number of F24 forms expected for each;
- the debit totals, the credit totals and the balance for each F24;
- the rows for which you had to interpret an ambiguous document;
- the identifiers that looked unusual to you;
- the credits reported, with their documentary source;
- what you did not find in the documents and the professional has to add;
- the reconciliation of the rows: how many rows you read in the documents, how
  many you wrote in PAGAMENTI, how many you aggregated and how many you
  excluded, with the reason. The two totals must add up, and if they do not you
  have to say why. The tool states how many rows it imported: that number and
  yours must match.

The file will be checked by the professional before import, and the tool will run
its own formal checks on balances, capacity, codes and identifiers.
The prompt forbids the AI from correcting tax codes and tribute codes that look unusual: they must reach the tool as they are, so that the formal check rejects them rather than an arbitrary correction upstream.
The file separates what stays valid across the years — master data, business, accounting setup, group, tax areas, disputes, transactions — from what changes in a single financial year. The template prepares the permanent profile; the year’s changes are added afterwards, from the tool.
Act as a tax data-preparation assistant for Tax Automation Lab.

COMMON RULES FOR ALL TAX AUTOMATION LAB TEMPLATES
They come before and above the specific instructions that follow.
1.  Read the template’s ISTRUZIONI sheet first: it holds the rules for this
    file, and they override any habit of yours.
2.  Use only the evidence contained in the attached documents. If a figure is
    not there, it is not there: do not reconstruct it, do not estimate it, do
    not fill it in by analogy.
3.  Do not correct and do not complete identifiers: tax codes, VAT numbers,
    tribute codes, VAT codes, account codes. Report them as they are and flag
    them. The formal check is the tool’s job, and that is how it should be.
4.  Delete or ignore every example row. If the template has an examples sheet,
    do not copy its content into the working sheets.
5.  Do not leave default values the document does not support. If a field
    allows a choice — statement layout, filing frequency, section — and the
    source does not state it, leave it empty: do not choose for the reader.
6.  If a figure is ambiguous, leave the cell empty and open a blocking finding
    in the “Esiti AI” sheet. An empty cell is visible; a confidently invented
    figure is not, and it travels all the way to the tax return.
7.  Cite the source of every non-obvious figure: document, sheet, row or page.
8.  Reconcile the counts: how many rows you read, how many you wrote, how many
    you aggregated, how many you excluded and why. The totals must add up.
9.  Do not rename sheets, columns or headers, do not add any and do not reorder
    them: the tool recognises them by name.
10. Do not declare a job complete while blocking findings are still open.

OBJECTIVE
Complete “Template_Fascicolo_Fiscale_Cliente_Configura_AI_v1.0.xlsx” to prepare a
first configuration of the Client tax file. The file separates two layers:
- the PERMANENT PROFILE, that is whatever stays valid across the years (master
  data, business, accounting setup, group, tax areas, disputes, extraordinary
  transactions, other matters);
- the FINANCIAL YEAR, that is only what changes or deserves attention in a
  single year.

AVAILABLE MATERIALS
I am attaching the template and one or more documents: they may be company
registry extracts, organisation charts, financial statements, trial balances,
tax computations, tax returns, working papers, contracts, audit records or
internal memos. No precise list is required: use what is there. If a document is
illegible or ambiguous, do not try to guess its content.

ABSOLUTE RULES
1. Do not invent. Fill in only what is supported by an attached document.
2. Leave blank whatever is unavailable or unverifiable. An empty cell is a
   correct outcome; a plausible but undocumented figure is an error.
3. Do not write “no findings”, “not applicable” or equivalent wording if the
   documents do not allow that conclusion. Leave it blank.
4. Do not change the structure of the workbook: do not rename, add or delete
   sheets and columns, do not move the headers, do not insert rows above the
   first header row.
5. One client per workbook.
6. The file may stay partial. Entire empty sheets do not block the import: an
   incomplete but reliable file is better than a complete invented one.
7. In the FISCALE sheet do not list IRES and IRAP as distinctive features: they
   are ordinary. Enter only regimes, features or matters that set this client
   apart.
8. In the FY sheet record only what is new in that year. Do not duplicate what
   is already in the permanent profile.

SHEET NAMES, COLUMN NAMES AND LIST VALUES STAY IN ITALIAN
The tool recognises sheets, headers and the values of choice fields by their
Italian name. Write your descriptions in the language you prefer, but leave
“ANAGRAFICA”, “Ragione_sociale”, “Ricorrente”, “Da monitorare” and every other
name and list value below exactly as they are.

FORMATS
- Dates: YYYY-MM-DD (for example 2026-03-31).
- Percentages: a number without the symbol, using the comma as the decimal
  separator (for example 80 or 30,5).
- Lists inside one cell: separate with a comma.
- “Stato” fields: use Ricorrente, Da monitorare or Risolto.
- “Fonte” field: name the document and, where useful, the exact point (for
  example “Visura camerale 2026, pag. 2” or “Bilancio 2025, nota 14”).

SHEETS AND COLUMNS

ANAGRAFICA — one data row only.
  Ragione_sociale | Codice_fiscale_PIVA | Paese | Esercizio_sociale |
  Chiusura_esercizio_MM_GG | Tipo_attivita | Mercati | Descrizione_business
  Esercizio_sociale: “anno solare” or the description found in the documents.
  Chiusura_esercizio_MM_GG: MM-DD format, for example 12-31.
  Tipo_attivita: one of Produttore, Distributore, Servizi, Holding,
  Immobiliare, Agricolo, Energia, Finanziario, Altro.
  Mercati: one of Italia, UE, Extra UE.

TEMATICHE_BUSINESS — distinctive features of the business model.
  Titolo | Stato | Descrizione | Fonte | Aggiornato_al
  One row per matter. Rows without Titolo are discarded.

CONTABILITA — one data row only.
  Principi_contabili | Tipo_bilancio | Reporting_di_gruppo | First_Time_Adoption

TEMATICHE_CONTABILI — recurring accounting matters, or matters to monitor.
  Titolo | Stato | Descrizione | Fonte | Aggiornato_al

SOCIETA_GRUPPO — one data row only.
  Gruppo_di_appartenenza | Direzione_e_coordinamento | Consolidato_civilistico |
  Parti_correlate

TEMATICHE_GRUPPO — corporate features that the organisation chart alone does not
show.
  Titolo | Stato | Descrizione | Fonte | Aggiornato_al

CARATTERISTICHE_FISCALI — one row per feature, a single column.
  Caratteristica
  Accepted examples: IVA mensile, IVA trimestrale, Consolidato fiscale,
  Transfer Pricing, Fiscalità internazionale, Regime di adempimento
  collaborativo, Gruppo IVA, Pro-rata IVA, CFC, Pillar Two.

GRUPPO_ENTITA — entities to show in the organisation chart.
  ID | Denominazione | Tipo | Forma | Colore | Cliente | Note
  ID: a short, stable identifier (E1, E2, HOLD, OPCO…). It only serves to link
  the relationships: invent one if the documents do not provide it.
  Tipo: Società, Persona fisica, Fondo / Trust, JV / Partnership, Stabile
  organizzazione, Altro.
  Forma: rounded, rect, circle, triangle, diamond (optional).
  Colore: teal, purple, navy, green, amber, rust, gray (optional).
  Cliente: write SI on the row of the entity that is the client of this file.
  Rows without Denominazione are discarded.

GRUPPO_RELAZIONI — relationships between the entities.
  Da_ID | A_ID | Quota_percentuale | Diritti_voto_percentuale | Tipo_relazione |
  Etichetta
  Da_ID and A_ID must match the IDs in the GRUPPO_ENTITA sheet.
  Ownership and voting rights can differ: fill in both only if the documents
  distinguish them.
  Tipo_relazione: Partecipazione, Controllo di fatto, Direzione e coordinamento,
  Altro rapporto.

FISCALE — relevant tax areas and matters.
  Area | Esito_area | Titolo | Stato | Descrizione | Fonte | Aggiornato_al
  Area: Imposte dirette, IVA, Ritenute, Transfer Pricing, Consolidato fiscale,
  Fiscalità internazionale, Agevolazioni & crediti, Altro.
  One row per matter; repeat the Area name on every row that belongs to it.
  Esito_area: fill it in only if the documents support a conclusion on the area.

CONTENZIOSO — audits, assessments, disputes, tax rulings.
  Titolo | Tipo | Autorita | Periodo | Tema | Stato | Rischio | Descrizione |
  Data_apertura | Data_chiusura

OPERAZIONI — extraordinary transactions.
  Titolo | Tipo | Data_efficacia | Descrizione | Aspetti_rilevanti
  Include completed transactions too, where they still produce effects over
  several years.

ALTRI_ASPETTI — other relevant permanent items that do not belong elsewhere.
  Titolo | Stato | Descrizione | Fonte | Aggiornato_al

FY — what is new in one specific financial year.
  Esercizio | Data | Sezione | Area | Titolo | Stato | Descrizione |
  Riporta_nel_profilo
  Esercizio: the year, for example 2026.
  Sezione: the section of the profile the item refers to (Anagrafica &
  Business, Contabilità & Reporting, Società & Gruppo, Fiscale, Contenzioso &
  Controlli, Operazioni straordinarie, Altri aspetti rilevanti).
  Riporta_nel_profilo: write SI only if the item is structural, that is if it
  changes the permanent profile and does not concern that year alone.

WHAT TO DELIVER
1. The completed workbook, with the same name and the same structure.
2. A short summary, outside the file, listing:
   - the sheets you filled in and those you left empty, with the reason;
   - the information you found but could not place;
   - the points where the documents were ambiguous or contradictory;
   - the items that need professional review before use.

The file will be checked by the professional before import. Your job is to
prepare a traceable working base, not a final client file.
The prompt forbids the AI from inventing, requires it to leave blank whatever the documents do not support, and to deliver separately the list of sheets left empty and of the points to verify.
The template collects three separate things: who the person is, how much they invoice and how much they spend. The profile comes before the numbers: the profession decides the pension fund and the company form compared, and the current regime is the starting point from which the difference is measured. The flat-rate thresholds, by contrast, apply to every scenario. Each cost carries its own VAT and deductibility rules, different between ordinary self-employment and the company: it is the only way to compare a regime that deducts costs with one that does not. The mix between director’s fee and dividend in the STP or STA is not to be decided upfront: the tool optimises it, and the template only asks how much has to stay in the company.
Act as a tax data-preparation assistant for Tax Automation Lab.

COMMON RULES FOR ALL TAX AUTOMATION LAB TEMPLATES
They come before and above the specific instructions that follow.
1.  Read the template’s ISTRUZIONI sheet first: it holds the rules for this
    file, and they override any habit of yours.
2.  Use only the evidence contained in the attached documents. If a figure is
    not there, it is not there: do not reconstruct it, do not estimate it, do
    not fill it in by analogy.
3.  Do not correct and do not complete identifiers: tax codes, VAT numbers,
    tribute codes, VAT codes, account codes. Report them as they are and flag
    them. The formal check is the tool’s job, and that is how it should be.
4.  Delete or ignore every example row. If the template has an examples sheet,
    do not copy its content into the working sheets.
5.  Do not leave default values the document does not support. If a field
    allows a choice — statement layout, filing frequency, section — and the
    source does not state it, leave it empty: do not choose for the reader.
6.  If a figure is ambiguous, leave the cell empty and open a blocking finding
    in the “Esiti AI” sheet. An empty cell is visible; a confidently invented
    figure is not, and it travels all the way to the tax return.
7.  Cite the source of every non-obvious figure: document, sheet, row or page.
8.  Reconcile the counts: how many rows you read, how many you wrote, how many
    you aggregated, how many you excluded and why. The totals must add up.
9.  Do not rename sheets, columns or headers, do not add any and do not reorder
    them: the tool recognises them by name.
10. Do not declare a job complete while blocking findings are still open.

OBJECTIVE
Complete the PROFILO, COMPENSI and COSTI sheets of
“Template_Confronto_Regimi_v1.0.xlsx” to compare the net personal cash of an
Italian lawyer or chartered accountant across three set-ups: the flat-rate
regime (regime forfettario), ordinary self-employment with an Italian VAT
number, and a professional company (STP or STA). The tool does not decide: it
calculates the three scenarios and states its assumptions.

BEFORE YOU START
1. Read the ISTRUZIONI sheet.
2. Look at the ESEMPI_NON_IMPORTARE sheet to understand the expected shape, then
   forget it: the tool does not read it and recognises those rows even if they
   end up in the working sheets.
3. The PROFILO, COMPENSI and COSTI sheets arrive with the value column empty.
   That is deliberate: if you upload them untouched the tool answers “no data to
   import”, and that is correct.

SHEET NAMES, COLUMN NAMES AND LIST VALUES STAY IN ITALIAN
The tool recognises sheets, headers and the values of choice fields by their
Italian name. Write your findings in the language you prefer, but leave
“PROFILO”, “Esiti AI”, “Bloccante”, “automatico” and every other name and list
value below exactly as they are.

THE PROFILE COMES BEFORE THE NUMBERS
The profession decides the pension fund — CNPADC for the chartered accountant,
Cassa Forense for the lawyer — and the company form compared: STP or STA. The
current regime does not change the thresholds, which apply to every scenario: it
is the starting point from which the tool measures the difference, and from
which it says what the change involves. Both are needed, and both must be
settled before the numbers. If the documents do not state the profession or the
starting regime, leave the cells empty and open a blocking finding: do not infer
one from the other.

FEES: WHAT THEY ARE AND WHAT THEY ARE NOT
Fees must be stated net of VAT and net of the mandatory pension surcharge
(contributo integrativo). The surcharge is charged by the professional on the
invoice and paid by the client: it is not revenue, and adding it inflates every
scenario. If the invoices show an all-inclusive total, strip it out and state how
you did so.
Use the words fees or revenue, not income: the flat-rate thresholds are measured
on fees collected, not on profit.
The previous year’s fees matter: above 85,000 the flat-rate regime does not apply
in the simulated year, and that figure is in the prior year’s tax return, not in
the current one.
Other personal income serves two purposes: IRPEF progressivity and the capacity
to deduct contributions. If the person has employment or pension income, state it
in the dedicated row as well: above 35,000 it is a disqualifying condition.

DISQUALIFYING CONDITIONS: STATE THEM, DO NOT INFER THEM
The rows answered SI or NO — the 5% rate for a new activity, incompatible
shareholdings, activity mainly towards an employer or former employer — are
declarations by the professional, not conclusions of yours. Set them to SI only
if a document says so. If you find nothing, leave NO and open a finding saying
the requirement has not been verified.
Careful with the 5% rate: exceeding 85,000 during the year does NOT cause its
loss. Do not zero it out because the fees are high.

THE COMPANY: DO NOT DECIDE THE MIX YOURSELF
“Modalità di calcolo della società” must be left on automatico, which is the
default: the tool looks by itself for the combination of director’s fee and
dividend that leaves the most net personal cash. It is not a figure to infer
from the documents, it is what the tool calculates.
Set it to manuale only if the documents say the fee and the distribution have
already been resolved and must stay as they are: in that case also fill in
“Remunerazione dalla società”, “Compenso amministratore” and “Utile distribuito
%”, and open a finding stating which resolution they come from.
“Quanto deve restare in società” is a constraint, not a preference: enter the
euros that have to stay in the company for working capital, investments or
shareholder agreements. The tool optimises while respecting it. If the documents
do not state it, leave zero: what stays in the company is not money available to
the person, and does not enter the comparison.

TWO ROWS THAT CHANGE THE RESULT, AND THAT GET FORGOTTEN
“Rapporto di lavoro precedente cessato”: the 35,000 threshold on the previous
year’s employment income does not apply if that employment has ended. Set it to
SI only if a document certifies the termination AND no employment or pension
income arrives in the simulated year: a new employment makes the disqualifying
condition operative again. If you have the termination but do not know whether
there is new income, leave NO and open a finding: this is the case where a wrong
inference changes the outcome of the pre-check.
“Prima iscrizione alla Cassa prima dei 35 anni”: Cassa Forense halves the minimum
personal and surcharge contributions for the first six years of registration. It
applies to the lawyer only, and it needs the date of first registration, not the
present age. For CNPADC the reduction is not modelled by the tool: set it to SI
anyway where it applies, so that the tool states it among the assumptions.

COSTS: TWO DIFFERENT NUMBERS THAT MUST NOT BE CONFUSED
For each item, the annual amount is what leaves the pocket. The percentages that
follow say how much of that amount is relevant for tax, and they differ between
ordinary self-employment and the company. Do not adjust the amount to account for
deductibility: the amount is gross of every rule, and the rules live in the
columns.
State whether the amount is net of VAT or VAT-inclusive in the “Importo IVA
compresa” column: under the flat-rate regime VAT is not recoverable, so getting
that column wrong shifts the comparison by the whole tax.
“Uso professionale %” is for assets that are also personal: the personal share
leaves the pocket but does not enter the comparison between regimes.
“Tetto % dei compensi” is the upper limit of the deduction, not a second
reduction. The items that have one already carry it: entertainment at 1%, travel
at 2%. Do not touch them unless a document requires otherwise.
If an expense does not fit any item, add a row with a new name: the tool creates
the item and starts from the generic rules. Do not force it into an existing item
with different rules.
Employee costs have an effect of their own: above 20,000 they are a disqualifying
condition for the flat-rate regime. Keep them separate from contractors who
invoice.

PROFESSIONAL COMPANY
Fill in the shareholding, the distributed profit and the structure costs only if
the documents support them. The shareholding determines the attributable profit,
the dividend and the contribution base: if it is not documented, leave it empty
and open a blocking finding, because an invented value shifts the whole company
scenario.
On remuneration, state dividend, fee or a mix, according to what the documents
provide for. If they do not provide for it, leave it empty: the choice belongs to
the professional, and the tool explores it anyway.
Do not reclassify the director’s fee between the pension fund and the Gestione
Separata: write what the documents say and, if they do not say it, open a
finding. The classification depends on the autonomy and the nature of the office,
not on an automatic rule.

“ESITI AI”: THIS IS THE PART THAT COUNTS
Every assumption, doubt or missing figure goes into the “Esiti AI” sheet, with
its source. Write “Bloccante” in the Stato column when the figure is missing or
ambiguous in a way that invalidates the comparison: the tool shows those
prominently and carries them into the export. A comparison with a blocking
finding still open is not a finished comparison.
Use “Risolto” only for what you have verified against a document, citing it.

FINAL SUMMARY
After the file, produce a bulleted list with:
- the profession and the current regime, with the document you took them from;
- the fees for the year and for the previous year, and how you stripped out VAT
  and the pension surcharge;
- the cost items you filled in, and which default rules you changed and why;
- the items you added because no suitable row existed;
- the flat-rate requirements you could not verify;
- the blocking findings still open;
- the reconciliation of the counts: how many cost items you read in the
  documents, how many you wrote in COSTI, how many you aggregated and how many
  you excluded, with the reason. The tool states how many rows it read: that
  number and yours must match.

The file will be checked by the professional before import. The tool runs its own
checks and states every assumption of the model on the page, but it does not
replace professional judgement and does not verify the declared requirements.
The prompt forbids inferring the profession from the regime or the other way round, and forbids setting to SI a flat-rate requirement that no document states: those rows are declarations by the professional, not conclusions of the AI. It also forbids adjusting the cost amounts to account for deductibility: the amount stays gross of every rule, and the rules live in the columns.
Check that the service is authorised under your firm’s or company’s policies and appropriate for confidentiality and data-protection obligations. Anonymise documents where necessary. Final classification remains the professional’s responsibility.
Completed templates are uploaded directly into the operational sections of each tool. The screens below show the exact route. The operational interfaces remain in Italian.
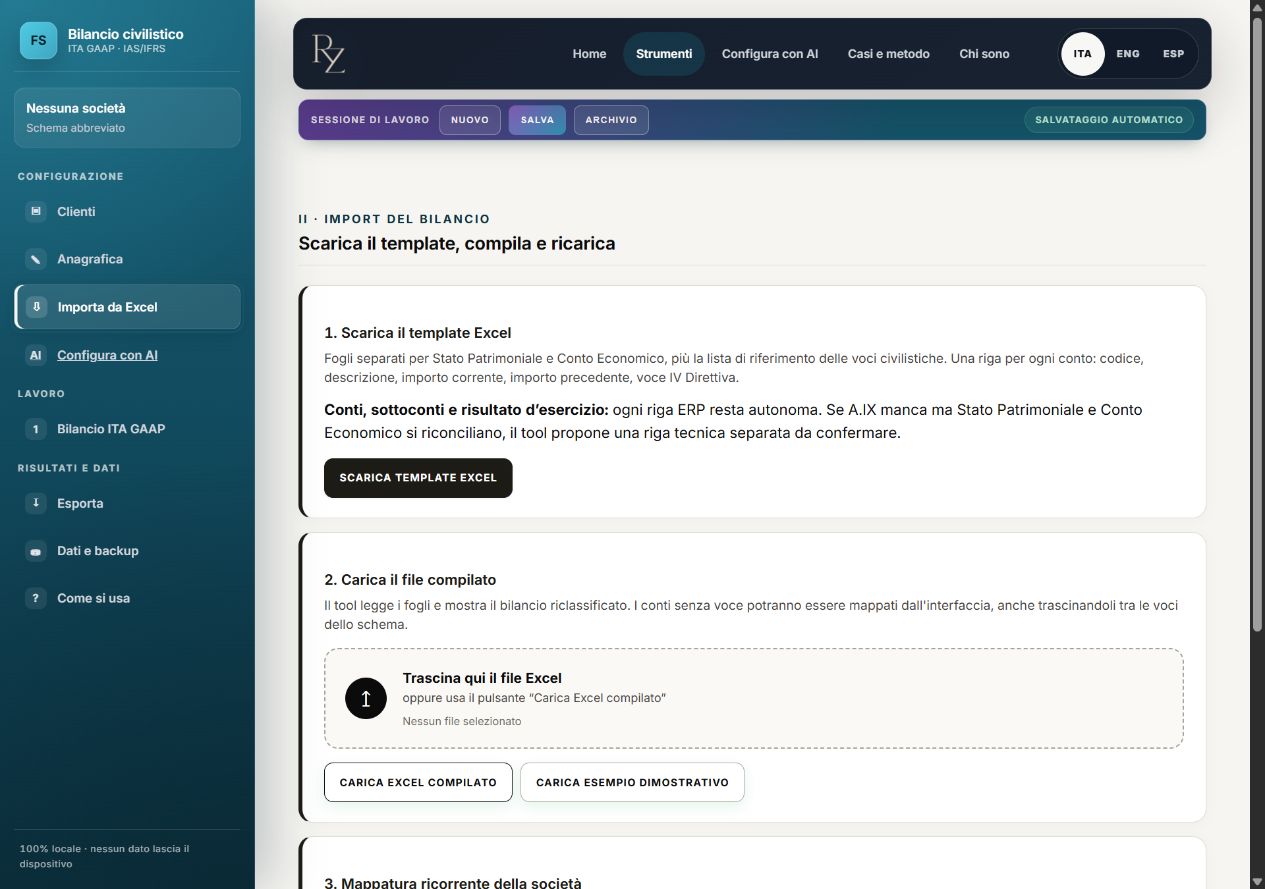
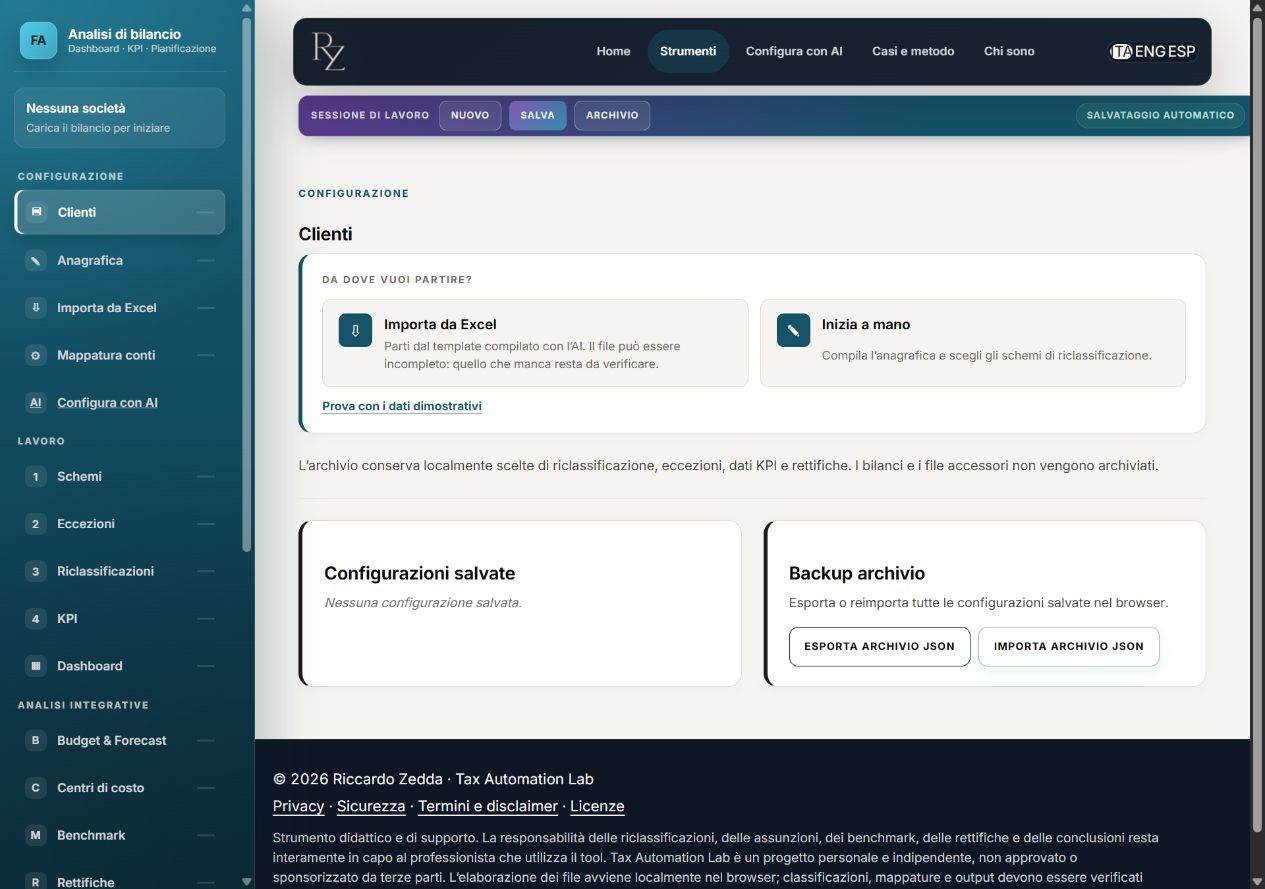
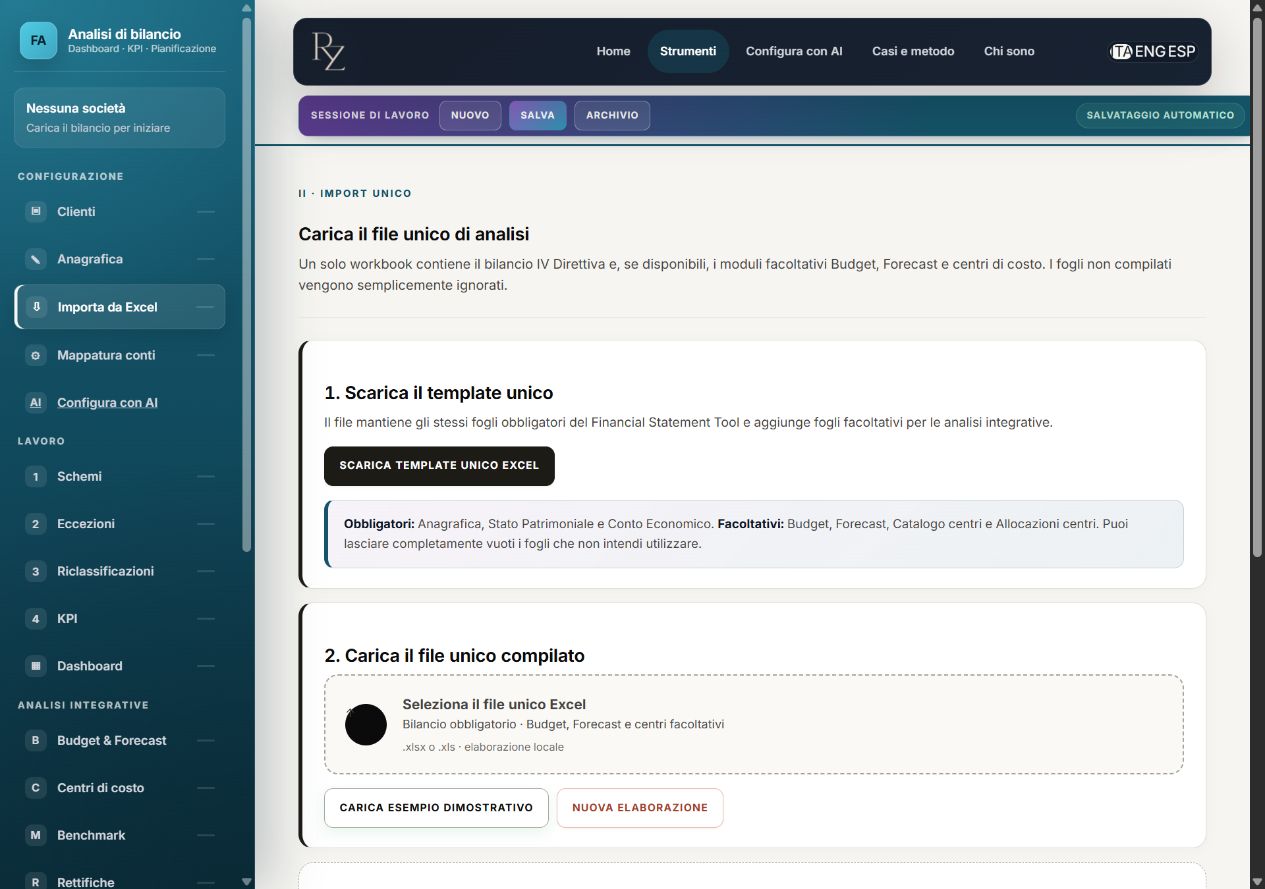
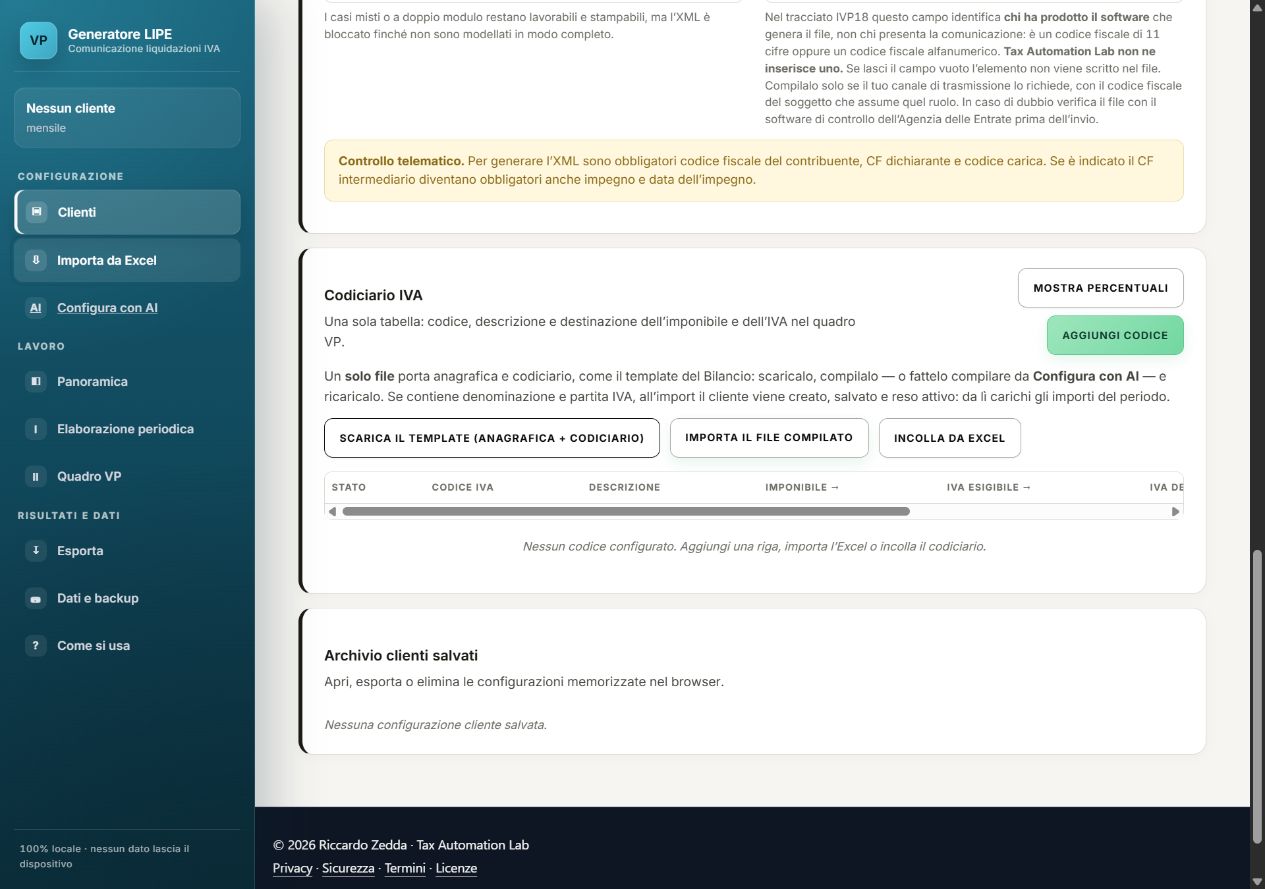
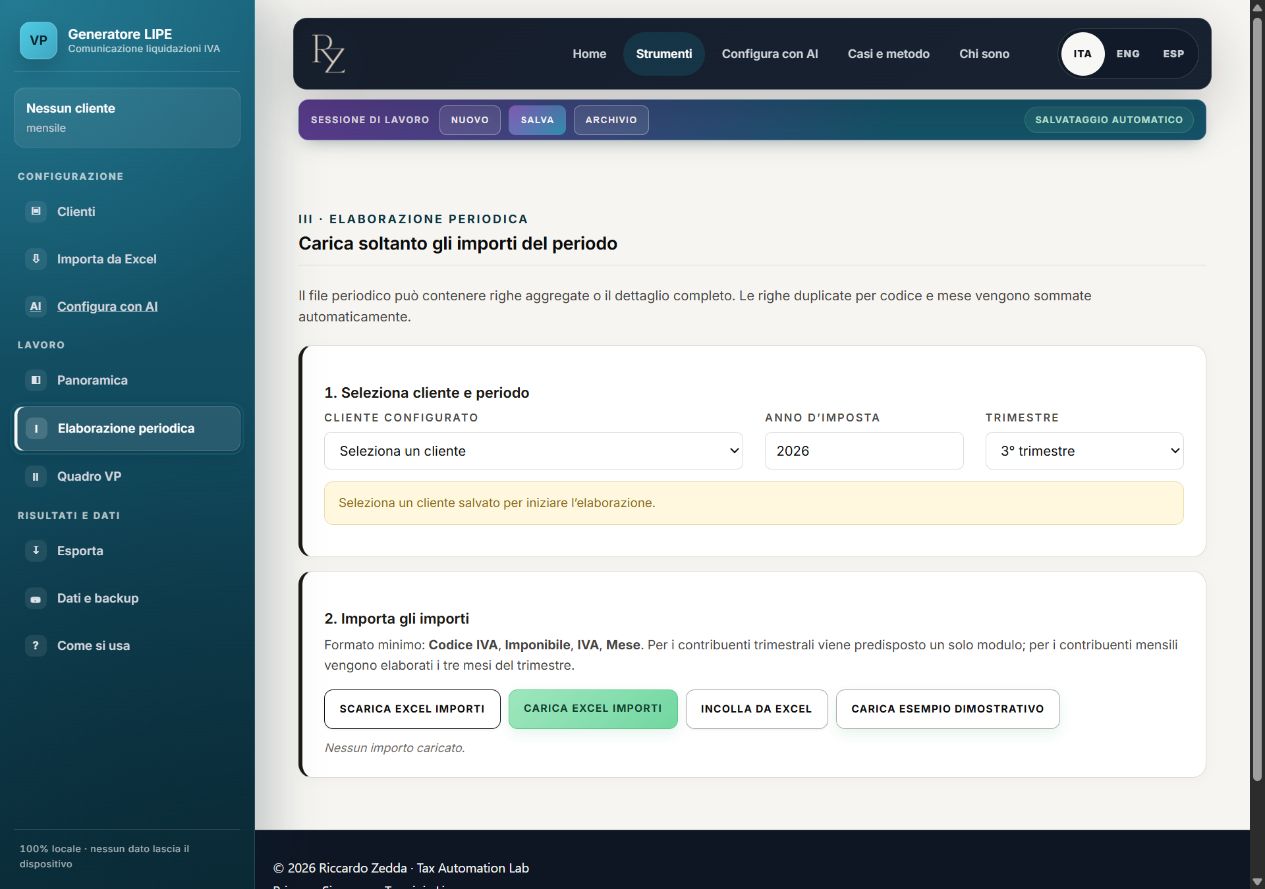
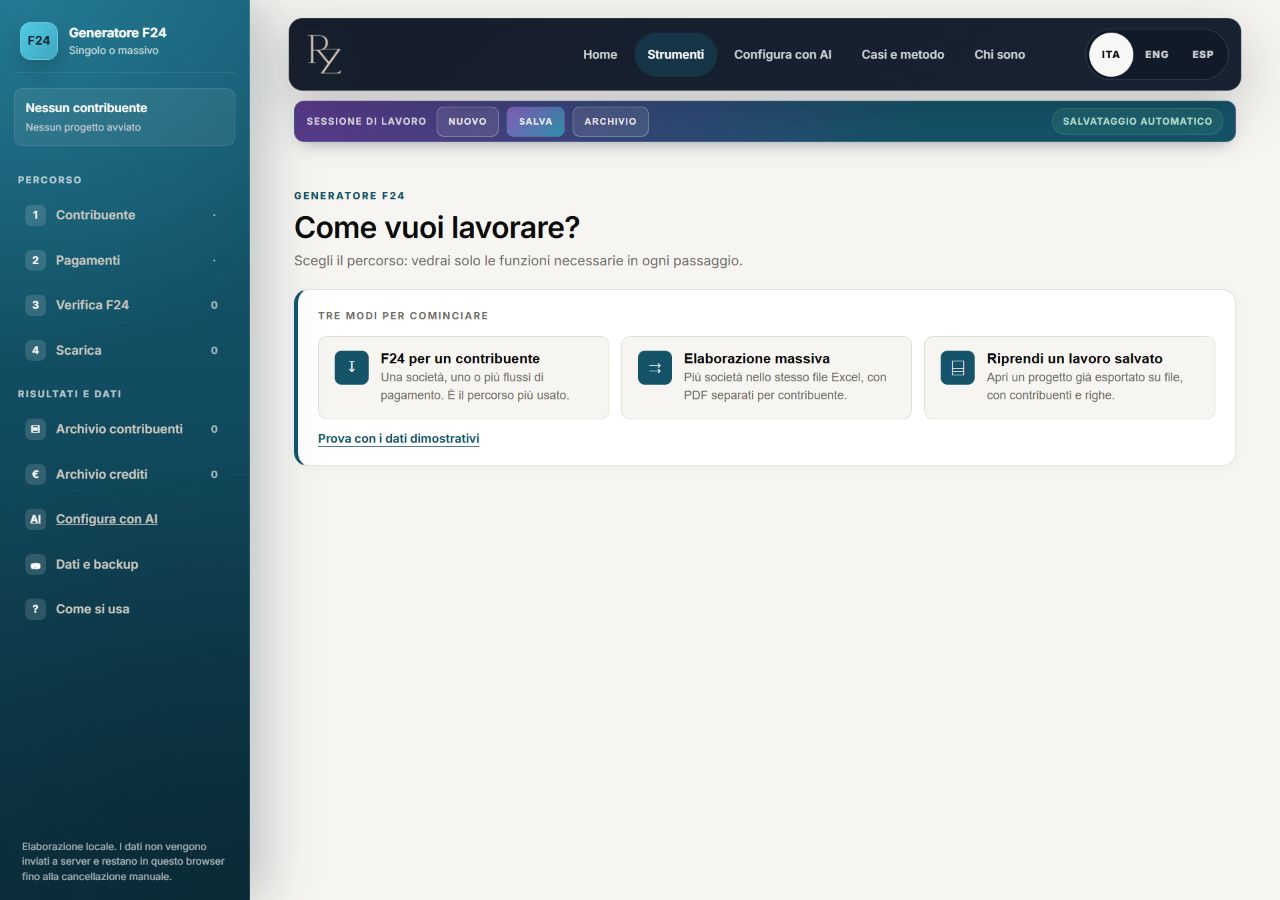
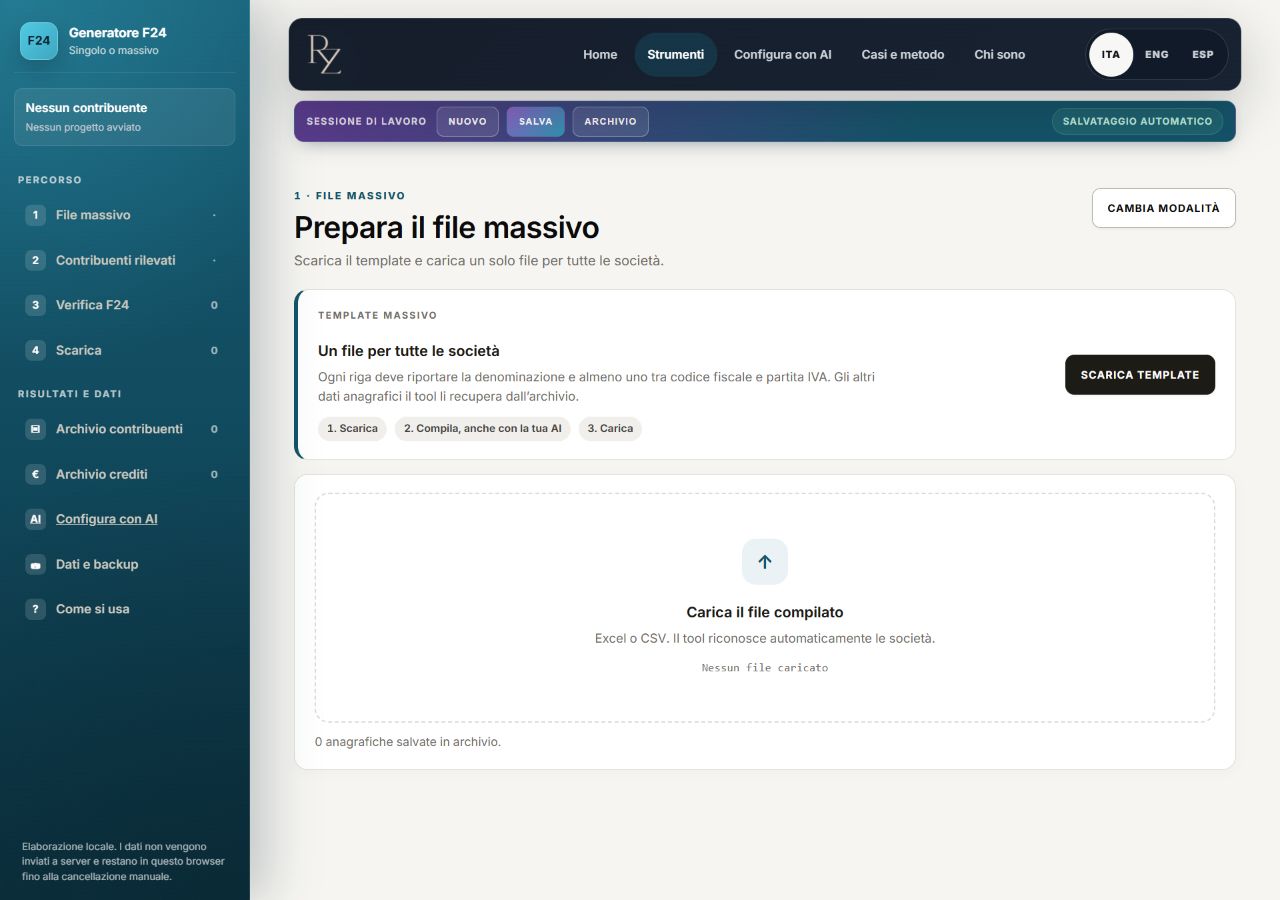
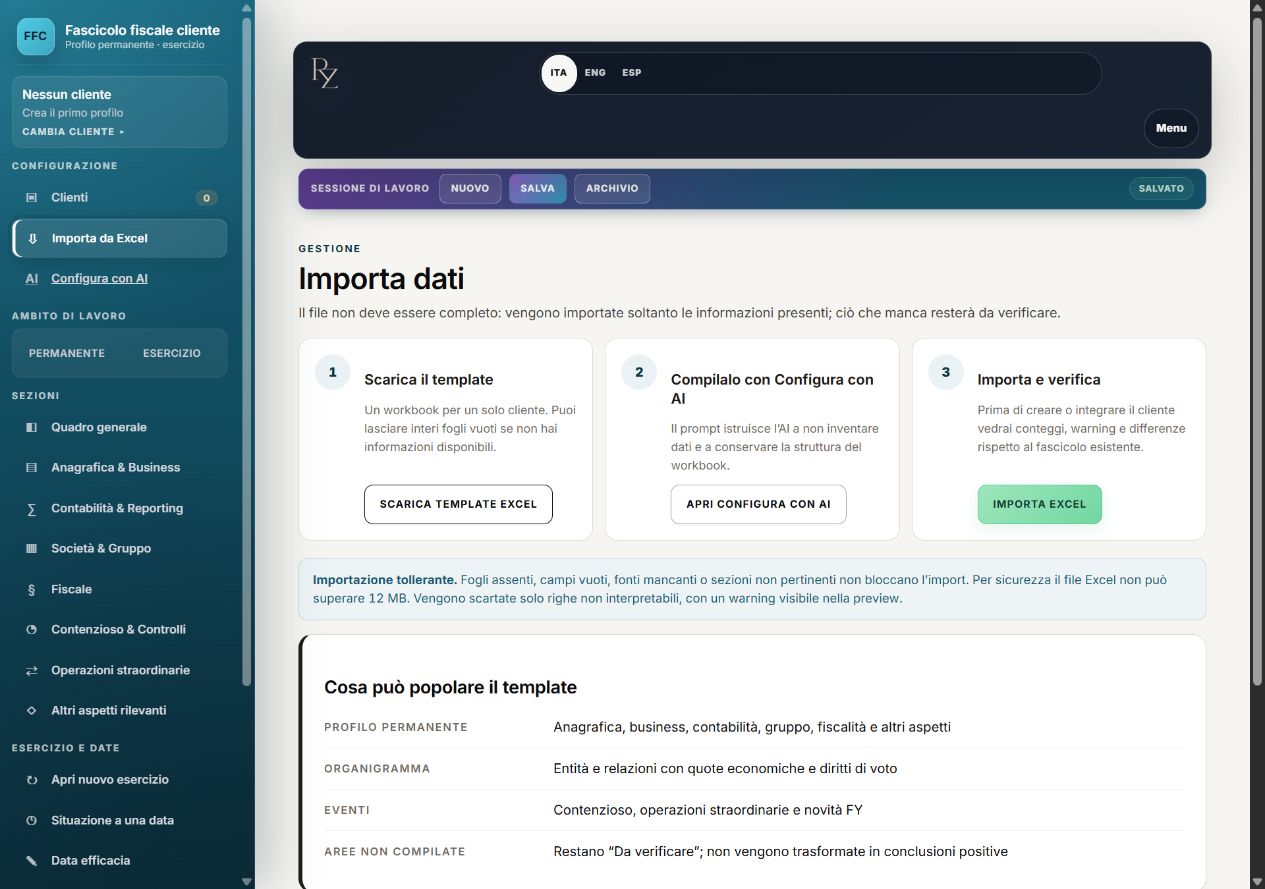
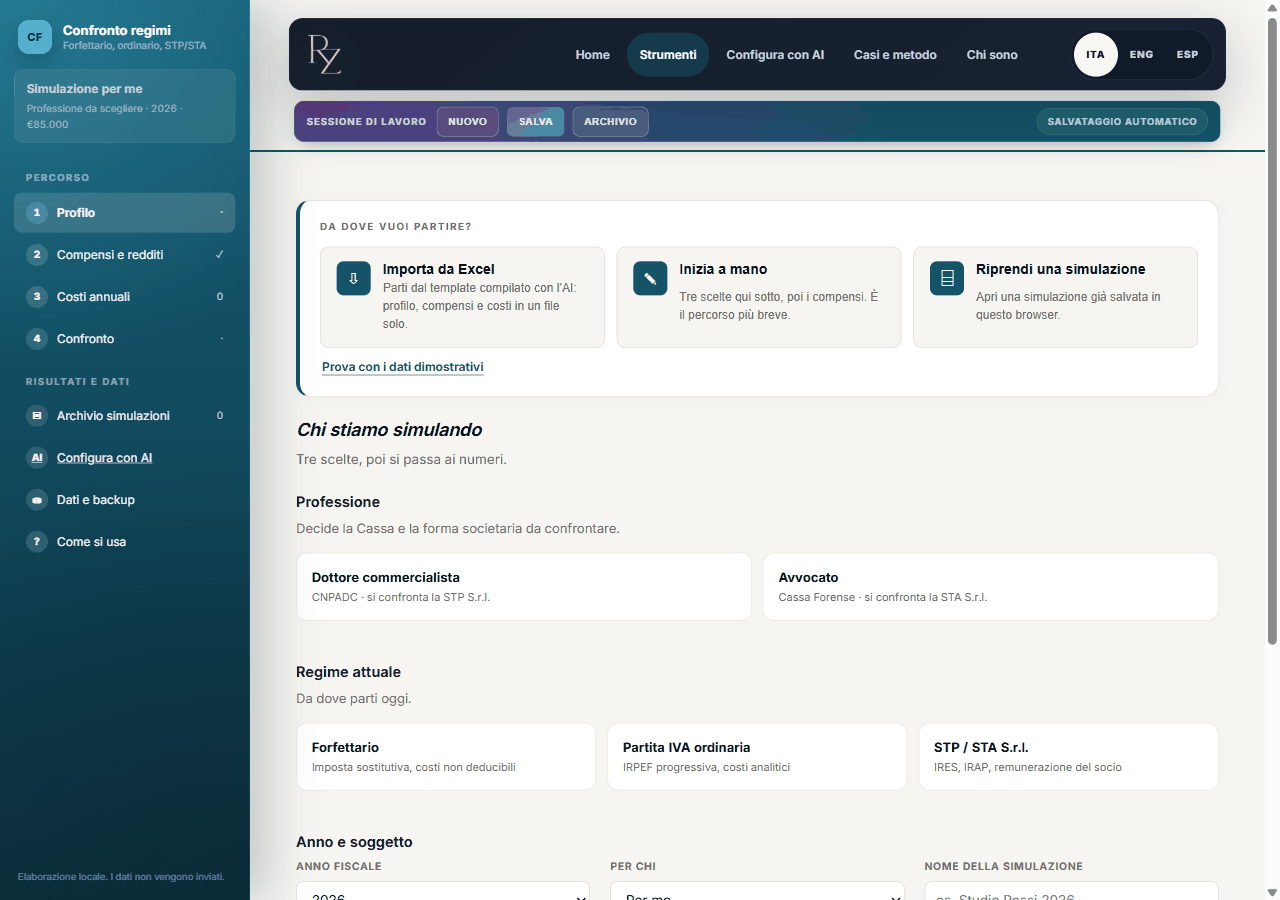
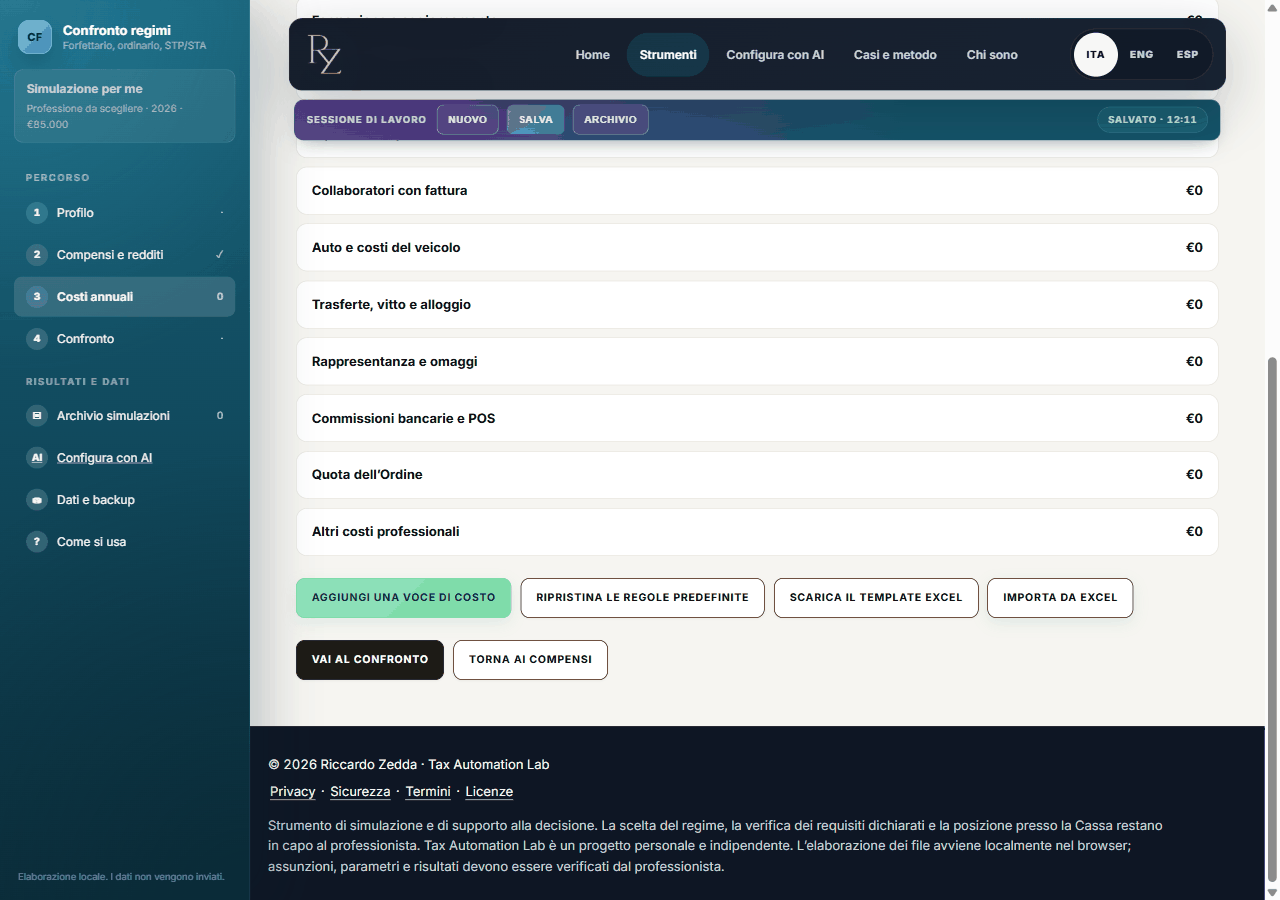
A partial file works: the missing fields keep their default values and the tool lists them. A value outside the accepted list, on the other hand, blocks the import and says which cell to correct.